The Process - Zander's Creations From Start to Finish
Selecting The Glass

Zander was able to choose from a selection of Coatings by Sandberg (CBS) Dichroic glass. In the UK we buy this from Warm Glass UK.
A video of him choosing his glass, and telling you about it, is on his YouTube playlist - click the photo to watch.
Tools and Safety

Zander uses multiple tools and safety equipment, including goggles, to cut the glass into smaller pieces.
Doesn't he look adorable.
Creating His Designs

With smaller glass pieces prepared, he can start to work out his designs. This is the really fun bit as he can play around with shapes, sizes and the colours of this amazing glass.
Each design is created using multiple layers of glass and glued together.
The Travelling Glass
The Travelling Glass

Our house is a couple of minutes drive from the studio. This means we have to get it from house to studio without dropping it! Mission complete this time.
Click the photo to watch on YouTube.
Kiln Time!
The Travelling Glass
Opening the kiln

Safely transported to the studio, it's now time to put Zander's creations into the kiln. We used a Skutt hot start pro electric kiln and a microwave kiln. The electric kiln is programmed to fire the designs to 804°C, the microwave kiln is done manually, both fusing the glass together and leaving them smooth and shiny.
Click the photo to watch on YouTube.
Keep scrolling to see him using a microwave kiln and programming the Skutt kiln.
Opening the kiln
The Travelling Glass
Opening the kiln

It's like Christmas everyday when you are opening a your kiln in the morning!
The kiln ran for just over 7 hours and cooled for around another 7-8 hours. Waiting for it to get below 29°C so it can be safely opened is a test of patience.
They're all removed and, after each one has been looked at and favourites selected (all of them), it's time to look at them some more. Oh and then they are cleaned ready for the backs to be ground, cleaned and the bails glued on before attaching the chains.
Cleaning - Singing in the Rain

This picture shows rain water being used to clean the glass when it's fresh out of the kiln. There's no point in wasting water and rain is just so clean and free!
For the second clean, after grinding, Zander uses glass cleaner.
Grinding

This boy is amazing. Using a Dremel for many people can be a daunting thought. When the glass is cool, he is grinding the back where the bail will be glued on. This helps the glue bond the metal to the glass. Although he was nervous, he had a go and did a brilliant job!
Click the photo for his YouTube video.
Cleaning and Gluing
The Finishing Touches
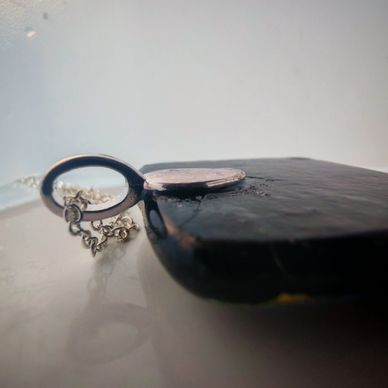
Grinding is repetitive but therapeutic. However, the worst part of finishing hundreds of pendants has got to be gluing. Corrine is not doing it this time, phew, Zander is! She will supervise, that's what mums are for surely. We use 3m DP460, it's really good for this purpose. Costs more than some glues but lasts ages and is really strong.
Zander actually only glued a few. I had to think about his safety and being exposed to epoxy adhesive for too long is not good for him, even with a mask and goggles.
The Finishing Touches
The Finishing Touches
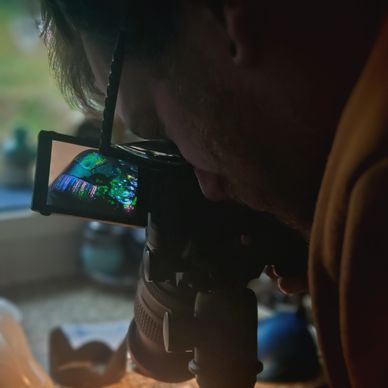
The next stage is to admire the beautiful glass pendants after adding the chains, then it's time to photograph them. We are very lucky to have a friend called Matt who does photography. After Corrine took photos, Matt stepped in to help with some macro (close up) shots. Zander wants to create prints from his designs and Matt is happy to help him.
Website and Listing
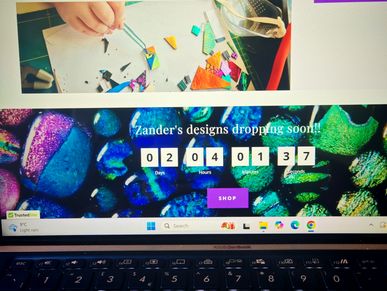
Uploading photos, ensuring they represent the colours as much as possible and putting the pendants online is a long process. Probably takes ages as Corrine is doing it herself. She just won't ask for help🤣
We have also had to work out how to add USA tariffs so people can pay it before it's shipped (DDP) in the hope the delivery will be simplified at the other end. Even Corrine is learning things!
Thank you so much for following Zander's journey and reading about the process. His enthusiasm and the amount of time he has spent creating really shows in his finished pieces. They truly are unique wearable pieces of art.
How You Can Help Zander's Mission

Now it's over to you. Zander will be so happy if you take a look at his designs in his shop. He hopes you find something you'd love to wear or gift to someone.
The SHOP button will take you to Corrine Thorne Glass Artist due to Zander being under 18 years old. Orders and contacts will go through his mum.
The Kilns
Zander Using a Microwave kiln

Yes you really can fuse glass in a kiln that goes in a household microwave. Corrine Thorne Glass Artist (Zander's mum) has been using them for nearly 25 years. She has taught many people to use them including Zander.
Click the photo to his YouTube video.
Zander Programming a Skutt Hot Start Pro

Being a 12 year old boy, Zander can be impatient. His patience was test when he got to programme the Skutt kiln. Lots of button pushing and comments of 'oh come on' haha.
Corrine is working on teaching him how to programme this type of electric kiln.
Click on the photo to watch Zander's YouTube video.
In a Nut Shell.
So much goes into this jewellery malarkey.
• selecting the glass, checking the colour shift by angling at 45°
• measuring
• cutting
• choosing the design
• stare at the beautiful dichroic glass
• gluing the glass together
• taking it to the studio
• programming the kiln
• removing from the kiln and cleaning
• grinding the backs
• cleaning again
• admiring the shinies
gluing the bails on
• photographing and filming through the stages
• photographing from different angles and in different light once the pieces are finished
• creating a website, editing, writing etc throughout
• uploading the photos and listing the glass to the website
• packaging the orders and going to the post office to ship to the UK, USA and Brussels so far
💜Zander has done an absolutely amazing job! He's even helped with the website!
If you're interested in workshops, please contact Corrine.